Thursday, February 25, 2016

Graphic 45 Cityscapes Mini Album


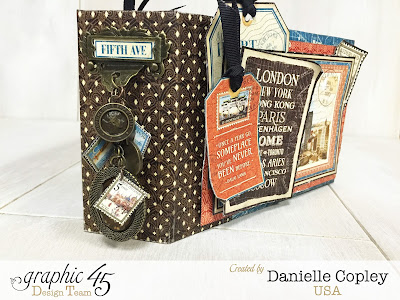
Happy Thursday! Today I have an album to share and as you know, I love making mini albums and I knew Cityscapes would make the perfect album to store photos of my family’s travels. Using a simple album page style, I was able to make the most of this gorgeous paper to frame the photos that will go in it. When I saw the new Graphic 45 Policy Envelopes I knew how fantastic they would coordinate with my album. They added the perfect pockets for our travel mementos and additional space for more photos and journaling tags. I just slit the bottoms open to attach to my album binding and they fit my album like they were made for it and came already perfectly coordinated!

Tip: A great way to add charms to the spine of your album is to use a Graphic 45 Ornate Label Holder. Punch a hole in the pull towards the edge with a heavy duty hole punch. Add a chain and some charms with some jump rings.

Tip: Don’t have the perfect matching charms? Make some by fussy cutting your favorite images from your design paper. Back them with cardstock or another fussy cut image that matches the shape to make it sturdier. Similar to what I did with the stamps on my album spine. Punch a hole in the corner and add a jump ring!


Check out my album tour here:

Cityscapes Mini ALbum, Graphic 45, Danielle Copley, Scrapbookmaven.com, photo 1

Cityscapes Mini ALbum, Graphic 45, Danielle Copley, Scrapbookmaven.com, photo 2

Cityscapes Mini ALbum, Graphic 45, Danielle Copley, Scrapbookmaven.com, photo 3

Cityscapes Mini ALbum, Graphic 45, Danielle Copley, Scrapbookmaven.com, photo 4

Cityscapes Mini ALbum, Graphic 45, Danielle Copley, Scrapbookmaven.com, photo 5

Cityscapes Mini Album, Graphic 45, Danielle Copley, Scrapbookmaven.com, photo 6

Cityscapes Mini Album, Graphic 45, Danielle Copley, Scrapbookmaven.com, photo 7

Cityscapes Mini Album, Graphic 45, Danielle Copley, Scrapbookmaven.com, photo 8


Supplies:
Cityscapes, Map the Past,
Global Odyssey, Street of Dreams, Well Traveled,
Passport to the World, Crossroads
May Arts Ribbon- Black
Prima charms

post signature

Friday, February 19, 2016

Voyage Beneath the Sea Layout with Graphic 45

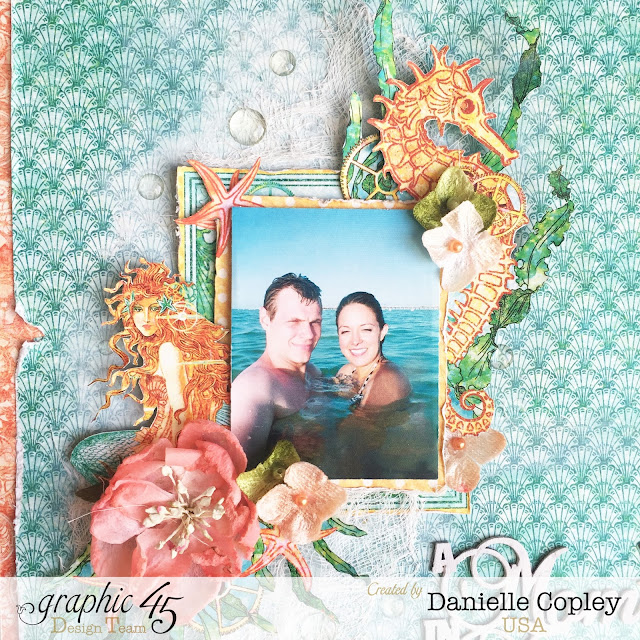
I have been looking forward to playing with Voyage Beneath the Sea since I first saw the sneak peeks and when I got the chance I had so much fun! I spent almost 10 years of my life growing up in the Virgin Islands and this paper just spoke to me. I found a beautiful picture of my younger sister and her beau and knew exactly what I wanted to create. A layout was perfect for emphasizing the wonderful moment in time they captured of themselves. I love adding cheesecloth to projects for subtle texture and the gesso painted lightly on the background paper made the fussy cut elements pop!


Supplies:
Voyage Beneath the Sea, Ocean Quest, Aquatic Passage,
Wild Wild Waves, Deep Blue Dreams, Steampunk Splash
Petaloo Botanica Blooms- Coral
Petaloo Velvet Hydrangeas- Sienna
Gina’s Designs Word and Phrases Chipboard
Gesso
Cheesecloth
Self Adhesive Clear Dots
post signature

Thursday, February 11, 2016

Valentine's Candy Box using Mon Amour by Graphic 45


Happy Thursday! Valentine's Day is so close, but it's not too late to make this fum and heartfelt gift.

When I think of Valentine’s Day, I think of flowers and chocolate. Mostly chocolate. Lots of chocolate. I used a heart shaped box to alter with Mon Amour papers and embellishments to hold delicious chocolate. For the top of the box, I layered fussy cut flowers to check off the flower’s box of ‘flowers and chocolate’, and I have the perfect gift for a special someone who may just be myself!


Supplies:
One and Only, Forever Mine, Dearest Darling
One and Only, Dearest Darling
Paper Mache heart shaped box
Mod Podge
Adhesive- wet and foam
black paint

post signature

Tuesday, February 9, 2016

Masculine Valentine's Day Card with Enchanted Forest by Graphic 45


Hello, all! Leading up to Valentine's Day, I made the mistake of leaving my shabby chic Valentine's card for my husband where he was able to see it :( So, I made a new one. This time around I thought I would make one that was not traditionally Valentine's-y but totally perfect for my husband. 

Enchanted Forest is a collection that really speaks to me and my family. My daughter and I love everything about romance, princesses, castles, etc. and my husband and boys love dragons, knights, and adventure. This made the perfect collection to make my husband a non-traditional, Valentine's Card.  With jewel tones, touches of gold paint, multiple layers, and curled corners, this card is romantic, yet masculine enough for the perfect Valentine’s card. Do you have a manly man or a romantic loved one you would like to make this card for? You are in luck with a step by step Snapguide tutorial!
Tip: Use paint (I used gold for this card) on your paper edges to add a fun, distressed look.


Supplies:
cardstock- black and cream
ribbon- green and wired gold
mulberry paper flowers
gold paint
adhesive and foam adhesive

I'll have a more traditional Valentine's idea on Thursday, so stay tuned. 
Thanks for stopping by!
post signature